Common Questions About My Auto Emblem Restorations
Because the enameling process is not widely known there are a lot of misconceptions.
Basically, an automobile emblem is die stamped from copper or a high copper content alloy. The die stamping process is also how coins are created. A newly stamped emblem has all the detail and reflective qualities of a “new” penny.
Ground glass is then carefully applied to the metal and placed into a kiln. The intense heat causes the glass to melt and bond to the surface. These enameled emblems are often mistakenly referred to as cloisonné. Cloisonné is an enamel process in which separate bands of metal are bent then applied, on edge, to a base. These labor intensive bands encase the enamel and create the design. I have yet to see an automobile emblem designed using the cloisonné technique.
The process that is commonly used for early automobile emblems is called champlevé (pronounced shomp´-leh-vay). The champlevé technique involves applying enamel into depressions in the base metal. These depressions may be etched, engraved or, in the case of automobile emblems, die stamped. The stamping process can also include the beautiful design work that shows under transparent enamels.
Historically the word enamel meant glass but today it seems to refer to any material with a shiny surface. The correct terminology is vitreous [glass] enamel. It is a true glass that melts and fuses around 1450 degrees F. The colors are created by the addition of metallic oxides to the glass while molten. Raw enamel can be obtained as opaque, translucent or transparent.
Enamels can be purchased in different sizes, or grades, depending on the desired application. They can be purchased as random chunks possibly ¼” across down to extremely fine powder. The most common form of enamel is ground to #80 mesh and, before firing, looks like colored granulated sugar. These enamels are formulated to molecularly bond with copper, silver and gold as well as have a similar expansion/contraction rate to those metals.
Only estimates are provided. Accurate records are kept and the job is ultimately billed by time.
A typical full restoration first includes removal of the plating and old enamel and straightening if required. New enamel will be applied, fired then stoned. More enamel, another firing step, more metal prep then polishing of the enamel and metal before the new plating. Most of the steps are done by hand to preserve the integrity of the emblem.
Things that take time [affect price] are: Number of colors, enamel type, and detail. Transparent colors require more steps and prep during restoration. Additionally, the base metal under transparent enamel requires more attention because it will be visible through the enamel. When a badge is contoured to fit a vehicle a jig must be made to assure the badge does not change shape during restoration.
The estimate also assumes that the existing metal is in decent condition. Unusual metal or mounting damage may alter the estimate. Dings, deep scratches and pits need to be approached very slowly. Sometimes I may have to leave a ding or nick in the finished badge. It will certainly be minimized but if I go too far then chasing the repair can put the badge in jeopardy. These areas must be reworked carefully so as not to remove any more metal than is absolutely necessary. Removed metal cannot be regained. It can also lessen the depth of cavity for the enamel. Variation of depth, especially in transparent enamels can cause a color shift or to appear less vibrant in thin areas.
Overt damage can be repaired but adds a significant price to the restoration. It may be the only option for a badge that is rare or elusive.
Turnaround time on emblem repair is dependent on how many jobs I have at any one time. Spring and early summer can get hectic with preparation for all the shows and turn around can be 4 to 5 months. If timing is an issue please let me know. I will work with reasonable deadlines whenever possible.
Basically….….no prep.
Sometimes the best intentions create a situation that is time consuming to undo.
The only prep would to be sure that a contoured badge correctly fits the vehicle. This necessary step might include even more damage to the glass but the glass is going to be replaced anyway. The shape of the badge is more important.
Again…..….No.
Any plating has to be removed before restoration begins. Plating would be damaged by the heat required to mature the glass. Plating is the last step. The plating process is electrical and the glass is an insulator. When plated correctly the glass enamel is not affected.
I can provide any plating required. I have extensive records for manufacturers and years. If there is doubt about plating then I will follow direction from you. Often classic auto websites, judging standards, or clubs specific to the vehicle can help with the information. The actual plating used is important if the vehicle is going to be shown for points.
Generally, emblems from the early 1900’s were soldered directly onto radiators and many had no plating. From the early teen years through the 1920’s the emblems were usually plated with nickel. Chrome plating started to show at the end of the 1920’s. Gold was used throughout the years, often to denote prestige.
When the automobiles took on aerodynamic lines many emblems were angled or curved to fit the contours of the vehicle. Be sure to fit the emblem before sending it. I will then use it to make a jig to help keep the emblem true during the restoration process.
Regarding the fit - With badges, there often is enamel only on one side. As the piece comes from the kiln, the glass acts as an insulator so that side stays hot longer. The bare copper side will contract more quickly. This causes the badge to curve away from the glass side and a contour becomes more pronounced. Again, with contoured badges a jig will be made to insure the final shape of the badge.
I see much damage related to the mounting or removal of emblems and feel strongly that a complete restoration should be functional as well as beautiful. The emblem should not have to be glued or taped back in place. I will try to find a solution that is in keeping with the original mode of attachment.
Prior to the 1930’s many of the emblems installed with some sort of formed steel friction fit hardware. High kiln temperatures necessary to mature the enamels will damage these mounts so they will be removed prior to restoration. Since lead solder was the traditional form of attachment then the mount will later be reattached with lead solder.
If the original steel mount is badly damaged or rusting away other options exist. One is to switch out a better mount from another emblem.
This seems like a simple question but it has different levels. The actual condition of the enamel will determine the answer.
If the enamel is truly good then a cosmetic approach is used. The old plating is removed, the metal is polished then re-plated.
If the enamel shows fine surface scratches or nicks then a different approach is to remove old plating then polish the scratched glass enamel and metal before replating. Obviously, this takes more time but still quicker than a full restoration because the emblem does not have to go through the kiln process.
Enamel may appear sound but still have cracks. In a transparent color the cracks are darker and obvious. In an opaque color the cracks are hard to see. Any crack indicates that the emblem has gone through some kind of stress. Sometimes the stripping process causes compromised enamel to release. What originally appears to be a cosmetic repair turns into a complete restoration.
Usually the answer is no. In the kiln an unseen microscopic crack can open and the enamel will curl back on itself when reheated. If dirt is present it can permanently bond into the color. The less time consuming and more practical approach is to remove the old enamel and start fresh.
There were a variety of ways that the emblems were installed. Originally, they were often soldered in place directly onto the exposed radiator. As production of vehicles amped up a variety of steel friction cups or bars appear in the 1920’s. Later, in the 1930’s as emblems were contoured to fit body lines, threaded studs became the common method for installation. Of course, this method took more time to attach. But, I believe, the payoff was also that there was less stress on the emblem. The emblems of this time often had vibrant, jewel like transparent colors. Too much stress would cause a visible crack and the badge became scrap. The earlier press on emblems of the 1920’s usually employed opaque colors that could hide a crack.
Clips and fold over tabs were also employed as were rivets. Of course, badges could be simply attached through holes in the emblems but beware. In almost every case an original attachment hole will be bordered by a ring of metal. This protects the enamel from damage caused by direct contact with a screw head. If you find a hole directly in the enamel it was probably placed there by an owner or collector after the fact.
I only offer this suggestion because many of the repairs I do were caused by removal of an emblem. Although not fool proof, it should make the removal of the emblem easier.
A lot of the pre-1920’s North American emblems used steel mounting cups and a friction fit. By pulling from the front, this type of emblem will often be bent and damaged during removal. When an emblem must be removed from a radiator shell then find a socket head or dowel that will snugly fit into the recess of the mounting cup. A few mallet taps from behind should help remove the emblem without further damage. Position something soft to catch the emblem when it pops free.
Damage to the metal is by far the hardest to deal with.
Additional processes and time increase the cost of restoration. In the case of a somewhat common badge, it may be more practical to locate a replacement.
If the emblem is rare then more intensive steps can be taken.
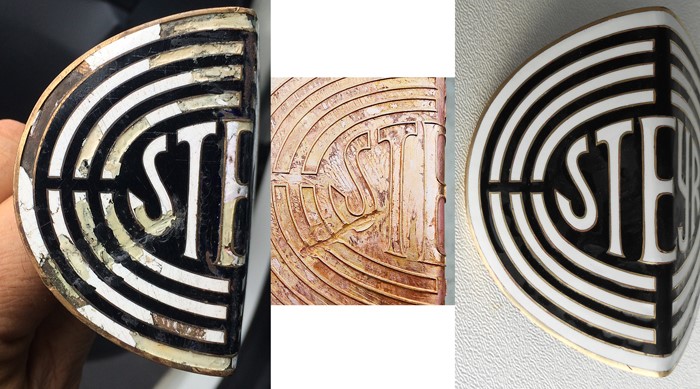
This 1923 Steyr racecar badge had a nasty gash as well as overall damage affecting the design.
The metal was carefully built up using a laser welder then the metal was hand engraved to replicate the design elements.
The Packard emblems appeared first in 1929. This original style was only used one year and is less common than the later versions.
Design elements were mashed. Laser welding and hand engraving brought the emblem back to original appearance.
Regarding the repairing of holes. The issues are mechanics, metal and chemistry.
Holes are extremely difficult to repair correctly. It can be done but is very time consuming. The greatest success is if the hole is drilled solely in an area of opaque enamel. It becomes more difficult if the hole involves any bordering metal. In that case a compatible metal will be built up in that area. Any excess metal will then be hand engraved to match the original design elements. Color deviation between the compatible metal and the original badge metal would be obscured by the final plating of the badge or hidden under opaque enamel.
Chemistry is a greater issue with transparent enamels. Glass enamels originally get their color from metallic oxides. During the enamel firing process the glass actually bonds with the backing metal. Migration of metal into the enamel can cause a color shift to the enamel. Also, the majority of enameled badges are struck from pure copper but the repair metal is an alloy. A medium to light color transparent enamel may not be able to mask the difference.
The less obvious mechanical consideration is when the hole is in an area of transparent enamel. Not only does the hole need to be repaired but the metal often has to be textured to match any original patterning under the enamel.
The holes were not original on this Australian badge. If original, the holes would be surrounded by protective bands of metal plus the left hole is off center.
This badge is rare enough that the owner wanted it to be attached more securely.
During restoration the holes were filled and threaded mounting studs were attached to the rear.
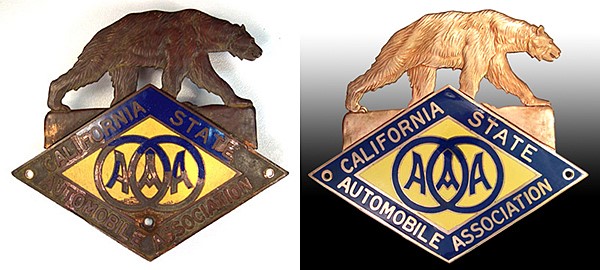
The lower center hole on this early California badge was not original and also had damaged the metal border dividing the blue and yellow areas.
Two holes on this Franklin badge were filled and metal was re-contoured to mimic the texture pattern
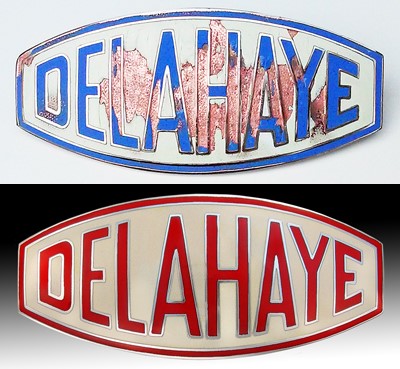
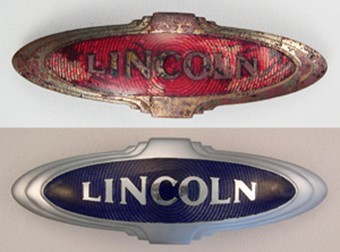
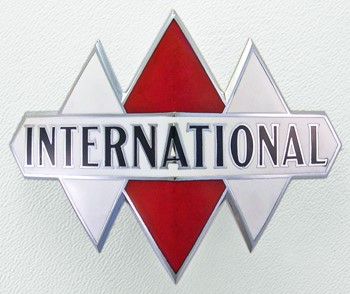
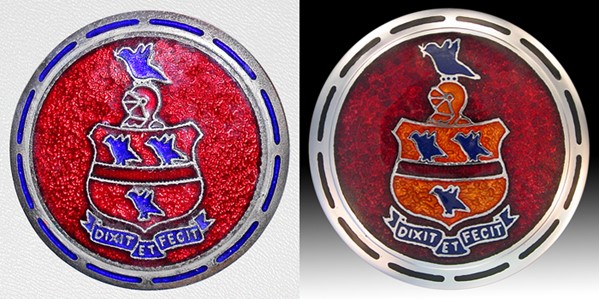
Since the original enamel will be removed, the replacement color technically can be anything. I have the ability to change colors and can, in some cases, change the “identity” of a medallion so that it is appropriate for your requirements.
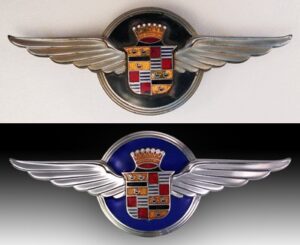
Damaged black Cadillac V8 wings restored with blue to become correct for a V12
Colors changed for a 1949 Delahaye
Damaged red 1931 Lincoln changed to blue 1932
1934 International with customized colors to match leather interior
Incorrect colors on this Pierce Arrow badge were restored back to correct original
This is a tough call. I have successfully worked on emblems that have been obviously restored before. Unfortunately metal is lost each time the badge is placed in the kiln. If a piece has been previously restored then these issues have already been doubled and will continue further with the next restoration.
Transparent colors, now thinner, can lose vibrancy or change intensity. Bright colors can darken and other colors take on an odd tinge due to the copper oxides mixing with the enamel under heat. There comes a time when the process can no longer proceed without completely losing the badge.
These process images show effects of the metal being burned.
In the first image the container at the left holds enamel grains that have been mixed with water prior to application. The enamel is controlled through capillary action. There is a small section at the bottom of the badge that still needs to be filled for completion. The firing of multiple colors at once means fewer times the emblem must go into the kiln.
The enamel must be mounded higher than the intended surface. With 2 or more colors, the enamel can't be applied as high. There is the very real chance that odd enamel grains will find their way into the wrong area. During firing the rough grains round over and compact, the air between the grains starts to escape and everything smooths over and compresses.
The second image is after a few minutes in the kiln. The glass enamel has melted and gone transparent. The exposed metal is obviously burned and flaking.
The last image is after the sanding step. The sound metal is exposed and the raised areas of enamel are brought into the same plane as the metal design elements. Shiny areas indicate where the enamel is still lower than the design plane. Those areas will be filled with additional enamel and the piece will go back into the kiln. The metal will again burn and the third step will have to be repeated.
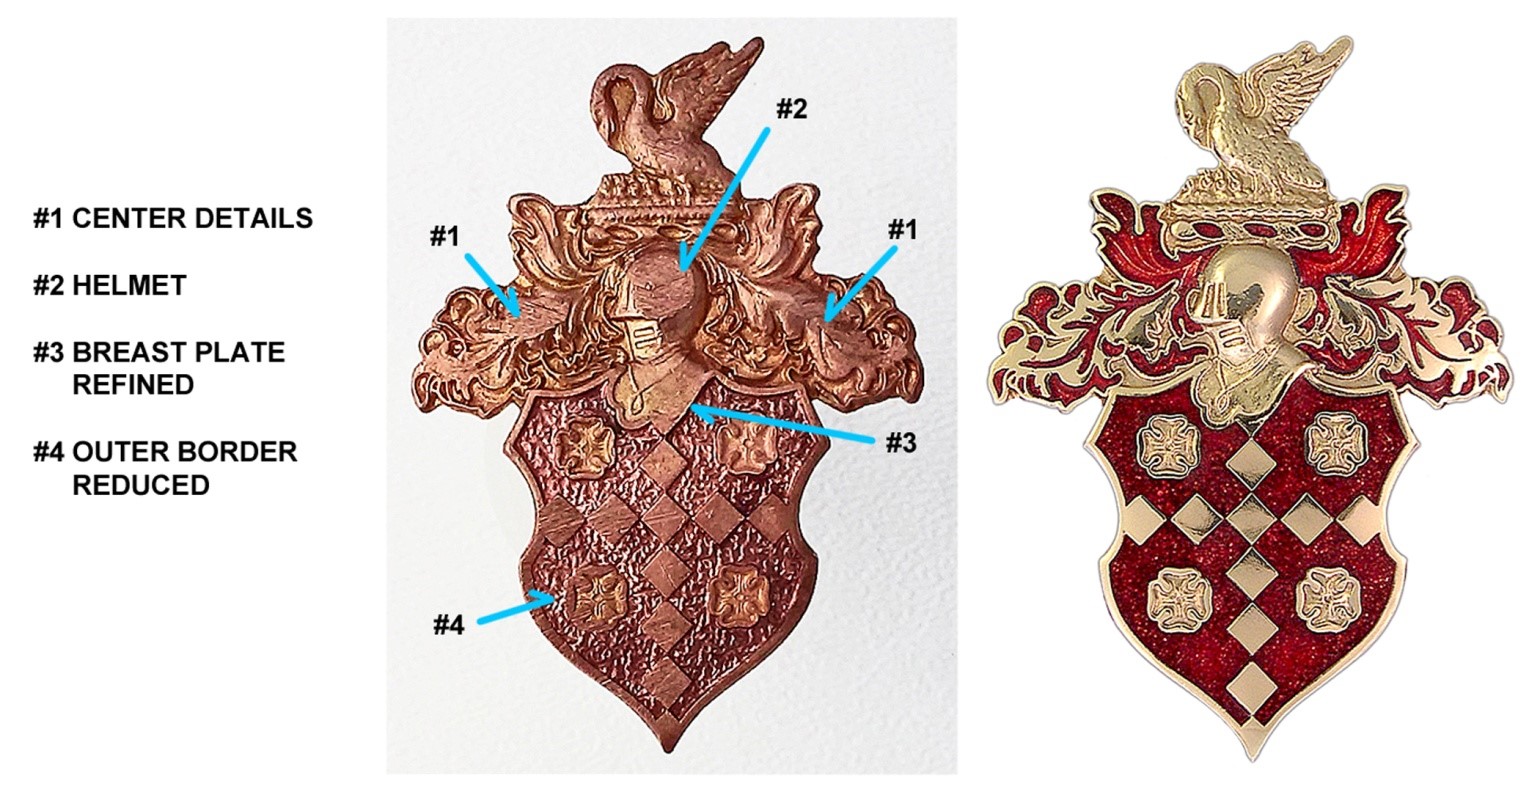
In some instances reproductions can be made for an emblem that cannot be otherwise obtained or is too badly damaged for repair. There are some restrictions to this process.
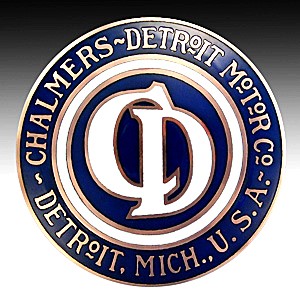
Reproduction for a 1910 Chalmers Detroit
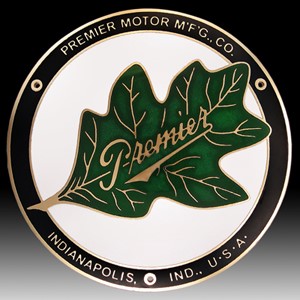
Reproduction for a 1909 Premier
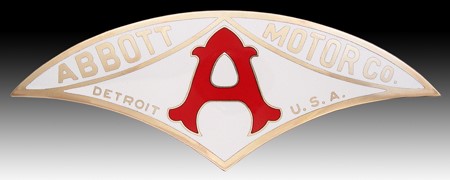
Reproduction for a 1912 Abbott Detroit
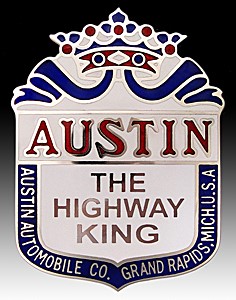
Reproduction for a 1917 American Austin
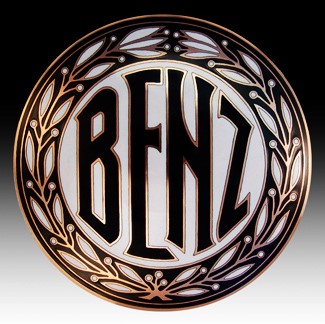
Reproduction for a 1911 Benz
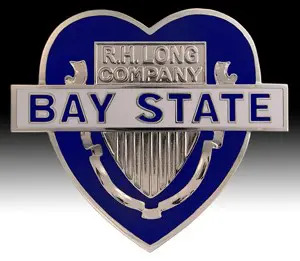
Reproduction for a 1924 Bay State
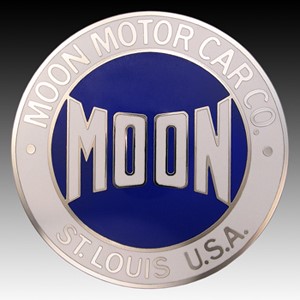
Reproduction for a 1910 Moon
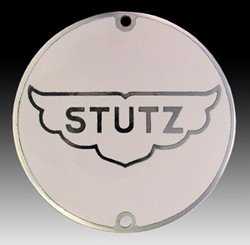
From a reproduction set of 6 hub emblems for a 1928 Stutz
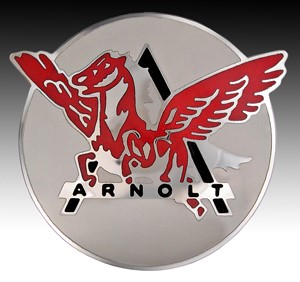
Custom horn button for an Arnolt Bristol
